When diving into the world of precision rifle shooting, there are many things to consider if you want to advance professionally or simply in skill level. We recently sat down with precision rifle shooter Jeremy Tye to discuss precision rifle shooting tips for beginners. You can read Part 1 and Part 2 here.
In this interview, we expand beyond the basics to learn some more precision rifle shooting tips, and what it takes to take your shooting to the next level. We discuss the importance of being able to factor for wind, proper shooting position, and how to best support your rifle while shooting, the correct way to use a tripod, and more.
As far as background, Jeremy Tye is an active duty LEO in the Southwest US with over ten years of experience, including several years as a full-time firearms instructor. Jeremy has been actively involved in shooting sports since he was a young child. He focuses on precision rifle disciplines, shooting NRL, NRL Hunter, PRS, and Quantified Performance Gas Gun matches. You can find more of Jeremy’s content on the CCWSafe and Firearms Trainers Association blogs.
Q: Jeremy, when it comes to precision rifle shooting tips, what is the biggest thing separating a beginner from someone more skilled?
Jeremy Tye – The biggest differentiator between an amateur shooter and a capable shooter in terms of skill level, not necessarily experience, is their ability to call wind on the fly. When you are starting with precision rifle shooting, one of the biggest things you deal with is wind, learning how wind affects a bullet in-flight, and the signs you need to look at from the shooter’s position and downrange to make that initial wind call.
First off, we need to make clear that we run guns in terms of ‘miles per hour.’ If we’re both shooting a stage, I should not be asking you what your wind hold was on the target in terms of Mils or Minutes. I should not be asking, “hey, was your hold .6 or .7?”
Rather, I should be asking you if you were running the wind at 5, 7, or 9 miles per hour. That speed translates to all guns, all calibers, all bullets, as a hold is only specific for your individual rifle/bullet combination. It might not have anything to do with mine.
I think that for beginner shooters, this is what they need to learn first. They need to ask, “hey, what was that guy running his wind hold at?” Once they know that, it will give them that initial information on what their hold should be.
Q: Knowing the rough speed of the wind is just the start, correct?
Jeremy Tye – Correct. A very capable shooter has the ability to alter that wind call on-the-fly. Let’s say that you started a stage and you gave me a pretty good starting point of 7 miles per hour, and that jives with what I was thinking. Now, when I get up on the stage and I shoot the first two targets, I realize that the 7 miles per hour hold is not working. My ability to alter that wind hold on-the-fly and not fall in love with that 7 miles per hour number and lock into it for the rest of the targets is what is going to separate me from everybody else.
High-level shooters will attack a stage, and if the wind is switch-y, tricky, or has not been consistent all day, you might see them miss the first target, but you won’t see them miss the rest because they will take the data and knowledge of that first shot miss and use it to alter their hold on the entire array of targets after that. They can do that because they are quick with the math in their head, and can see that miss clearly through the scope because they have built a good position behind the gun, and they can track that bullet in flight.
So, to recap, you’ve got to be able to alter your wind call on-the-fly, understanding what is going on with the bullet in flight. You have to recognize visual cues and then apply the necessary changes for the rest of the targets. To do all of this, you need to build an excellent, really stable position behind the rifle.
Q: So, it sounds like the key is to get yourself in a position where you can look through your scope and see the bullet as it heads downrange?
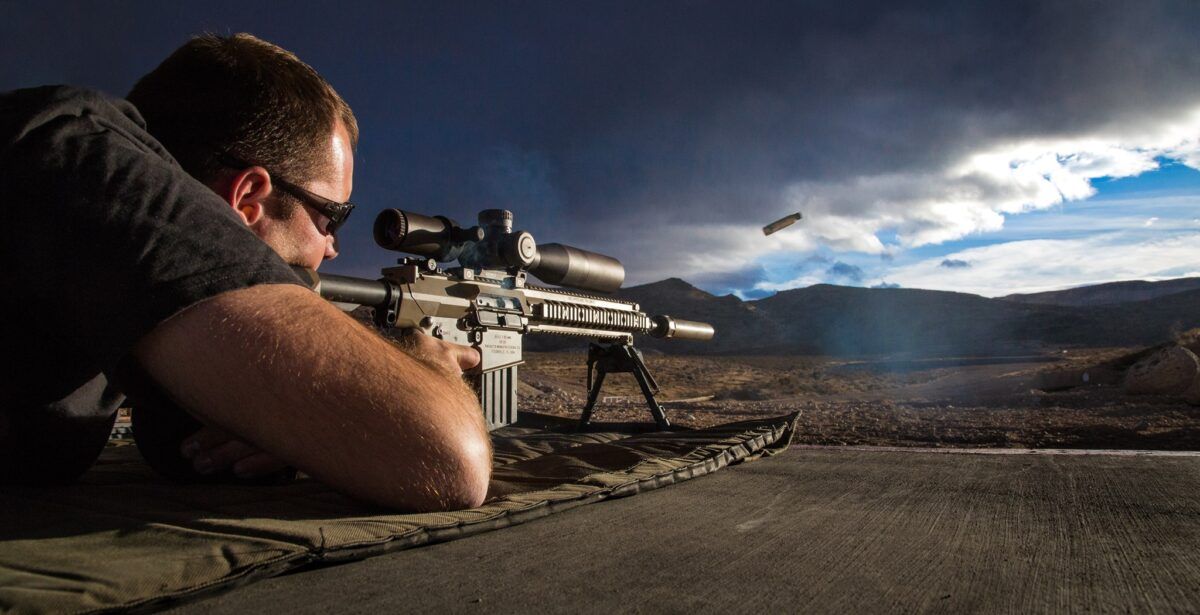
Jeremy Tye – That’s correct. Now, when you are shooting prone, it’s easy to get firm behind the gun, and if you are shooting steel at a distance – 600, 1,000, 1,400 yards – it’s also easy to see the bullet in flight, or ‘trace,’ through your rifle scope after you’ve broken a shot.
Now, while it’s easy to build a good position while prone in order to control recoil and watch that bullet in the air, it’s not quite as easy to do from a barricaded position – standing, kneeling, sitting, off a prop, off natural terrain, or off a tripod. In those cases, your position isn’t as structurally sound. Recoil beats you up a bit more, and you get more movement on the gun and in the scope.
However, just because it’s hard to build a good position does not mean it is impossible. A good shooter is still going to be able to build a good position in order to see that bullet in-flight and watch the wind push their bullet around in real-time.
Remember that by seeing the bullet, they don’t have to wait for a splash in the dirt behind a target that indicates a miss. Sure, splash is a good indicator, but it might not always be there. Imagine a situation where a target is silhouetted upon a skyline, or hidden in brush or grass. If you miss, you’re not going to see that poof of dust like you would on a nice, manicured range.
Q: Very briefly, can ammo selection help a shooter better manage the wind?
Jeremy Tye – With the quality of guns being produced and the consistency of ammunition from the factory and handloaders, everyone is pretty much on an equal playing field. There are still some calibers (medium 6’s like 6mm BRA, 6mm BRX, 6mm GT) that have a pretty significant recoil advantage, which can help shooters who want to spend a bit extra.
They recoil less, so it is easier to see the bullet in flight. However, the flipside is that they’re going to get beat up more in the wind because they’re not going as fast as the big 6s and the big 6.5’s, so it’s a bit of a tradeoff.
If you get good at calling the wind and you’re good at building a position, you can take advantage of those medium 6s, but if you’re not great at that stuff, the 6mm BRA, 6mm BRX, 6mm GT don’t really give you that much of an advantage.
Q: So, we’ve discussed wind. Before we move forward and discuss building a position, can you describe some of the barriers you shooting from?
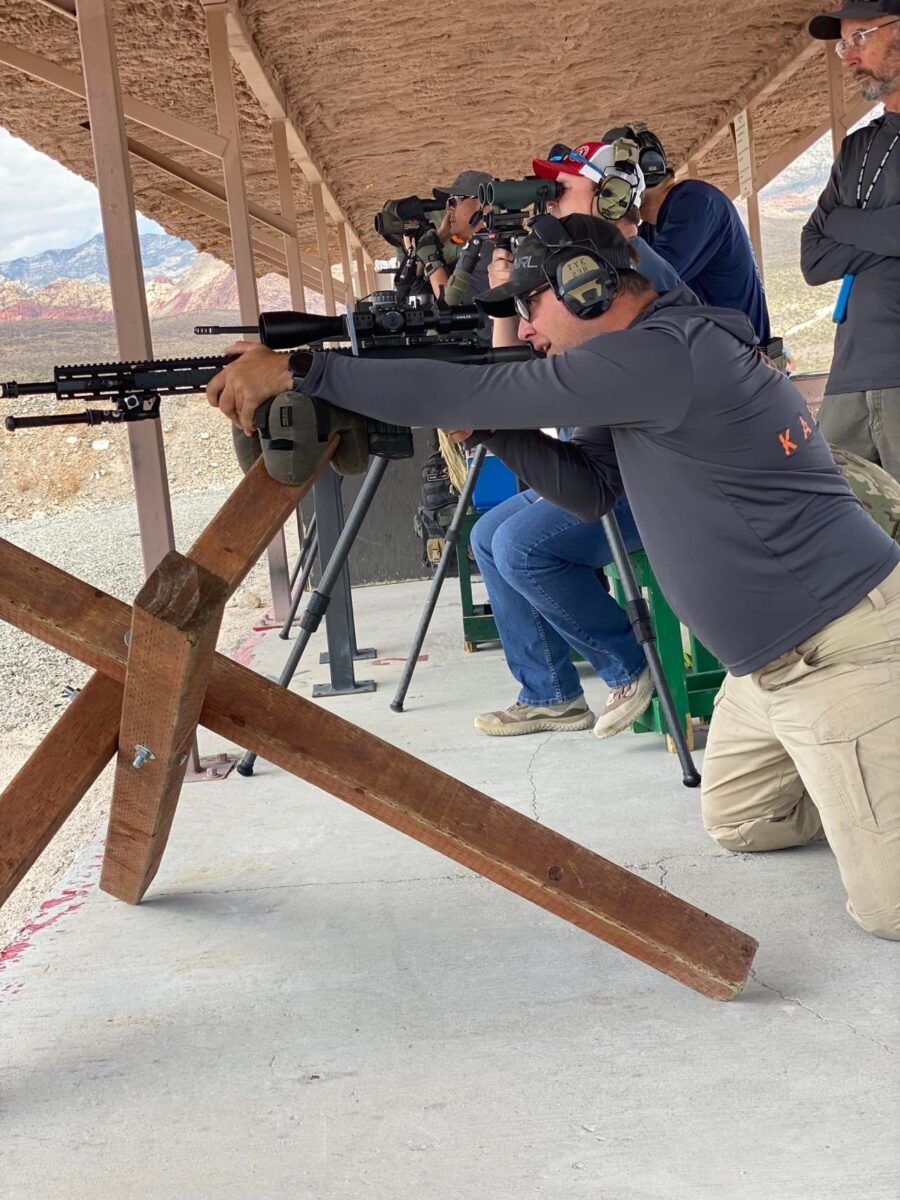
Jeremy Tye – The sky is the limit when it comes to barricades. As the sport has evolved, match directors have become more creative about what props, challenges, and obstacles they present to the shooters…PRS barricades are a very traditional prop to shoot off of.
Then you have tank traps, which have a bunch of shooting positions. Traditionally, you shoot off the tips of those three prongs, and you can also shoot off the center where the posts are screwed together. Vehicles are also pretty popular, too. Guys will bring out rusty old cars, trucks , and farm equipment.
Rooftops are also traditional props. Most people think of sitting on the incline and putting their rifle at the peak of the roof. However, as match directors have tried to make things more complicated, they’ll turn the rooftop 90 degrees left or right so that you’re shooting at an angle, having to lay on your side to shoot the rifle. Or, they’ll turn the roof all the way around, and you’ll shoot off the decline.
Depending on the angle of the rooftop, that can be very, very difficult. So most shooters have resorted to shooting that by using a tripod. They’ll put the tripod out in front of the rooftop and sit their butt on the rooftop. We’ll talk more about tripods in a bit…Finally, depending on what kind of match you go to, we’ll shoot off natural terrain as well.
Q: Does your approach change depending on what barriers you shooting off of?
Jeremy Tye – When building a position, it does not matter what kind of prop or barricade or natural terrain you’re shooting off of. Instead, you apply fundamentals to every situation. Basically, you are going to support the rifle in one of two ways. Let’s first focus on approaching a barricade using a balanced position and then move on to the other way.
Q: Sounds good. So, tell me about the balanced position…
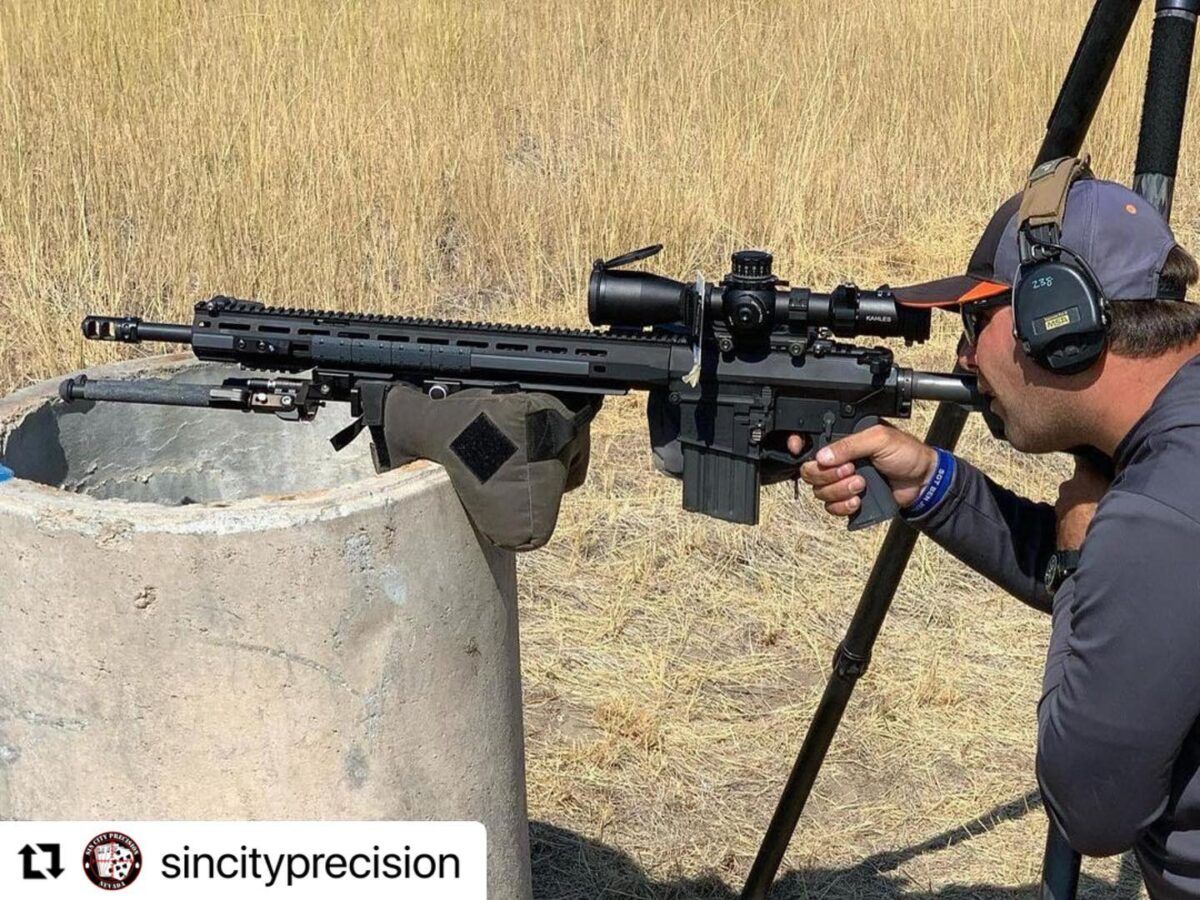
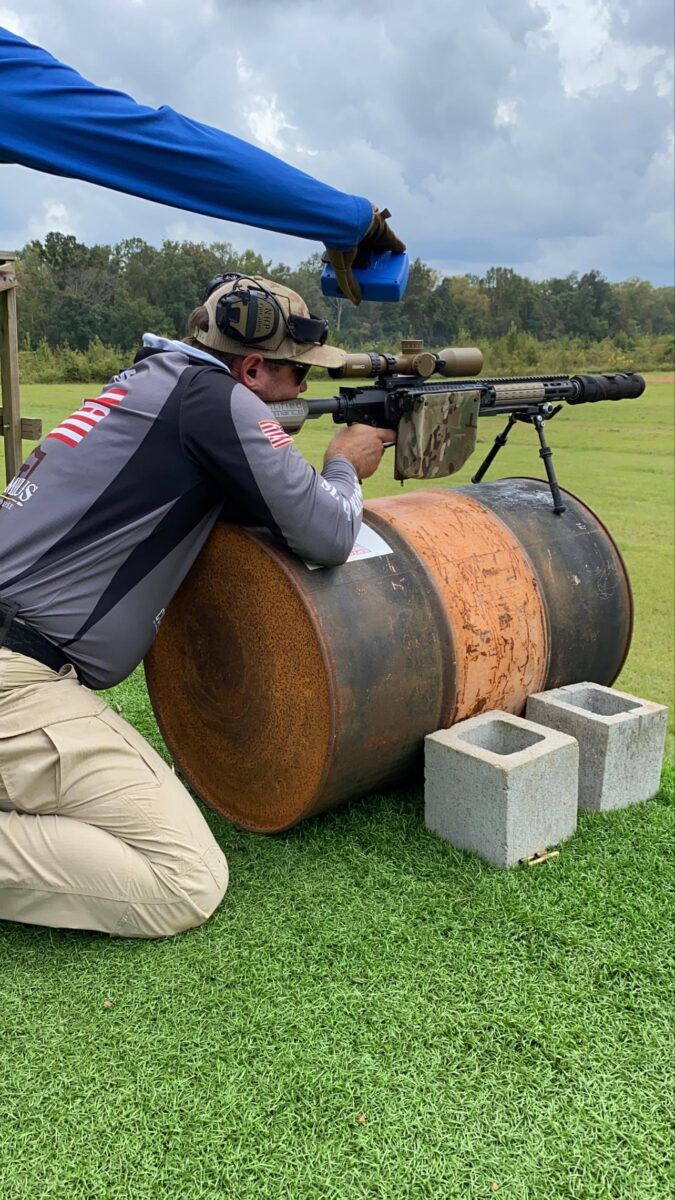
Jeremy Tye – The first way you can support the rifle is in the center, a balanced position… you’ll throw a bag up on a barricade and balance the rifle over the bag. Generally, that balance point is right in front of the magwell. This is why gun setup matters.
You want to build a balanced rifle so that if you throw a bag up onto any prop, you could balance your rifle on top of that bag, step away from the gun and let the rifle balance on that bag naturally without any support.
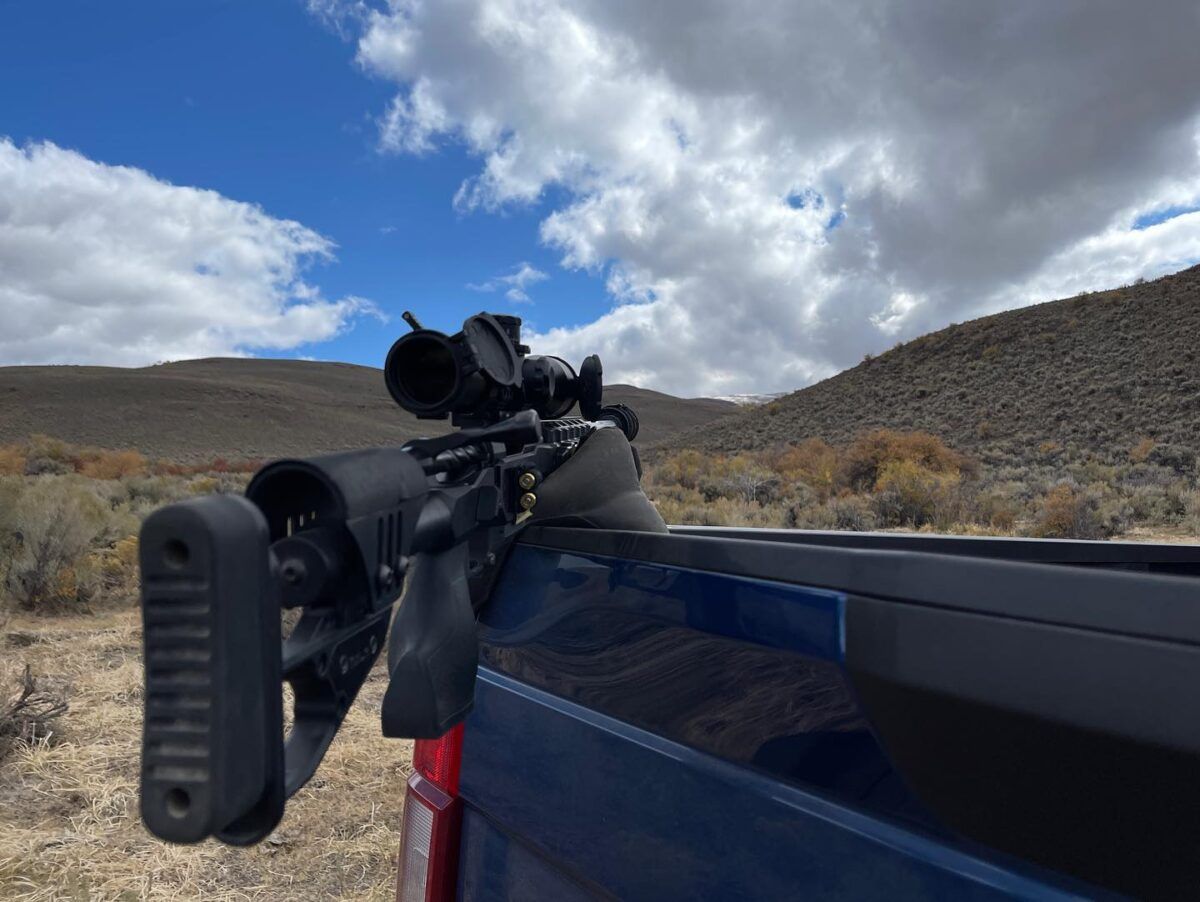
What’s nice is you can apply this center support position to just about any barricade – a PRS barricade, a sawhorse, ladder, vehicle, the bed rail of a truck…The barricade does not matter. You pick a spot to throw a support bag, and you put your rifle on top of that.
From that position, You are going to try to get behind that rifle and build as close to a modified prone position as you can. The goal is to be able to break a shot of that position and still be able to track the bullet and the trace while it is in flight. Then, if necessary, you can then apply a correction to the rest of your shots.
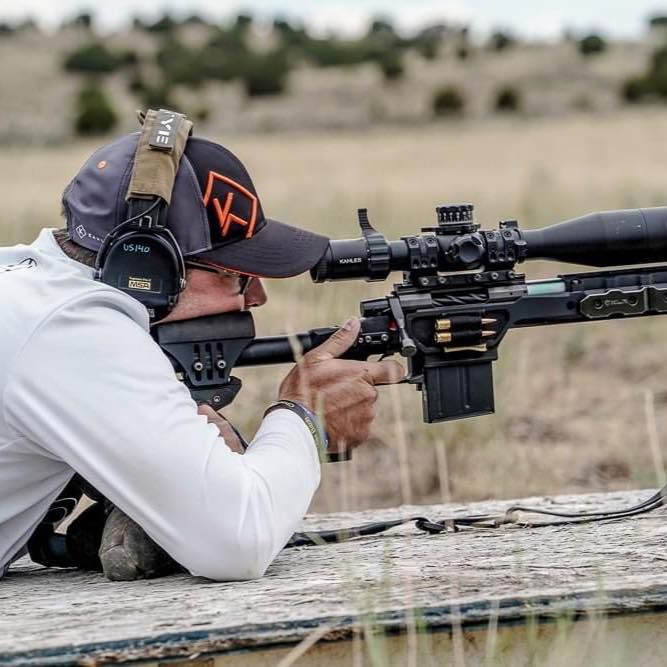
Q: You mention “modified prone position.” Can you clarify a bit about prone vs. modified prone?
Jeremy Tye – There are fundamentals to shooting from the prone position that your readers should know. For example, I want my spine to be in-line with the bore of the rifle, the bore of the barrel to the target. I want to separate my feet a comfortable distance. I want to get my ankles down on the deck. I turn my toes out, which increases my contact with the ground and increases my stability. I want my shoulders squared up behind the stock of the rifle as close to a 90-degree angle as possible.
Basically, I am building as rock-solid of a position behind the gun as I can, so that when I break that shot, the gun recoils into my body and returns to the same spot without any effort. This is what builds that shot-to-shot consistency. It’s what also allows me to see that bullet while in flight while it is going downrange.
I can apply these same fundamentals to almost any position. It does not have to be prone. We call that a “modified prone.” Instead of shooting off the ground, let’s pretend we are at a public shooting range to do load development or practice. I can use the same ideas when shooting off a bench.
When you see the shooting benches at the range, almost everybody shoots off them to the left side, as there are cut-outs and little stools. Well, that’s the wrong way to shoot. That seated position they’ve built doesn’t look anything like a prone position. However, I can put my rifle on the table and push it as far forward as possible so that the bipod legs are just behind that front edge. Then, I can come at the rifle from behind the bench, making sure that my spine is in line with the barrel.
Now, there is a 90-degree break because I am standing straight up, but the rifle is pointing at the target, and as long as those lines are parallel with one another, I can still separate my feet out. I can point my toes out. I can bend over at the waist and support my upper body with the table. I can get my shoulders square behind the rifle, and I am just basically leaning over the table at that point behind the gun. That’s a modified prone position.
I am not lying on the ground, but the only difference is the break in my hips where I am leaning forward. That might be a 45- or 60-degree angle, depending on how tall I am and how high the bench is. The fundamentals are the same, and you can apply this to not just a bench, but a PRS barricade, a tank trap, the bed rail of a truck, or a rock or tree.
The bottom line is that whatever you are shooting off of, the goal is always the same: balance the rifle on the prop with a bag, build as good of a modified prone position behind the rifle as you can – and then go to work.
Q: Moving on to the next type of position then, let’s talk about shooting with two points of contact, and what we need to know.
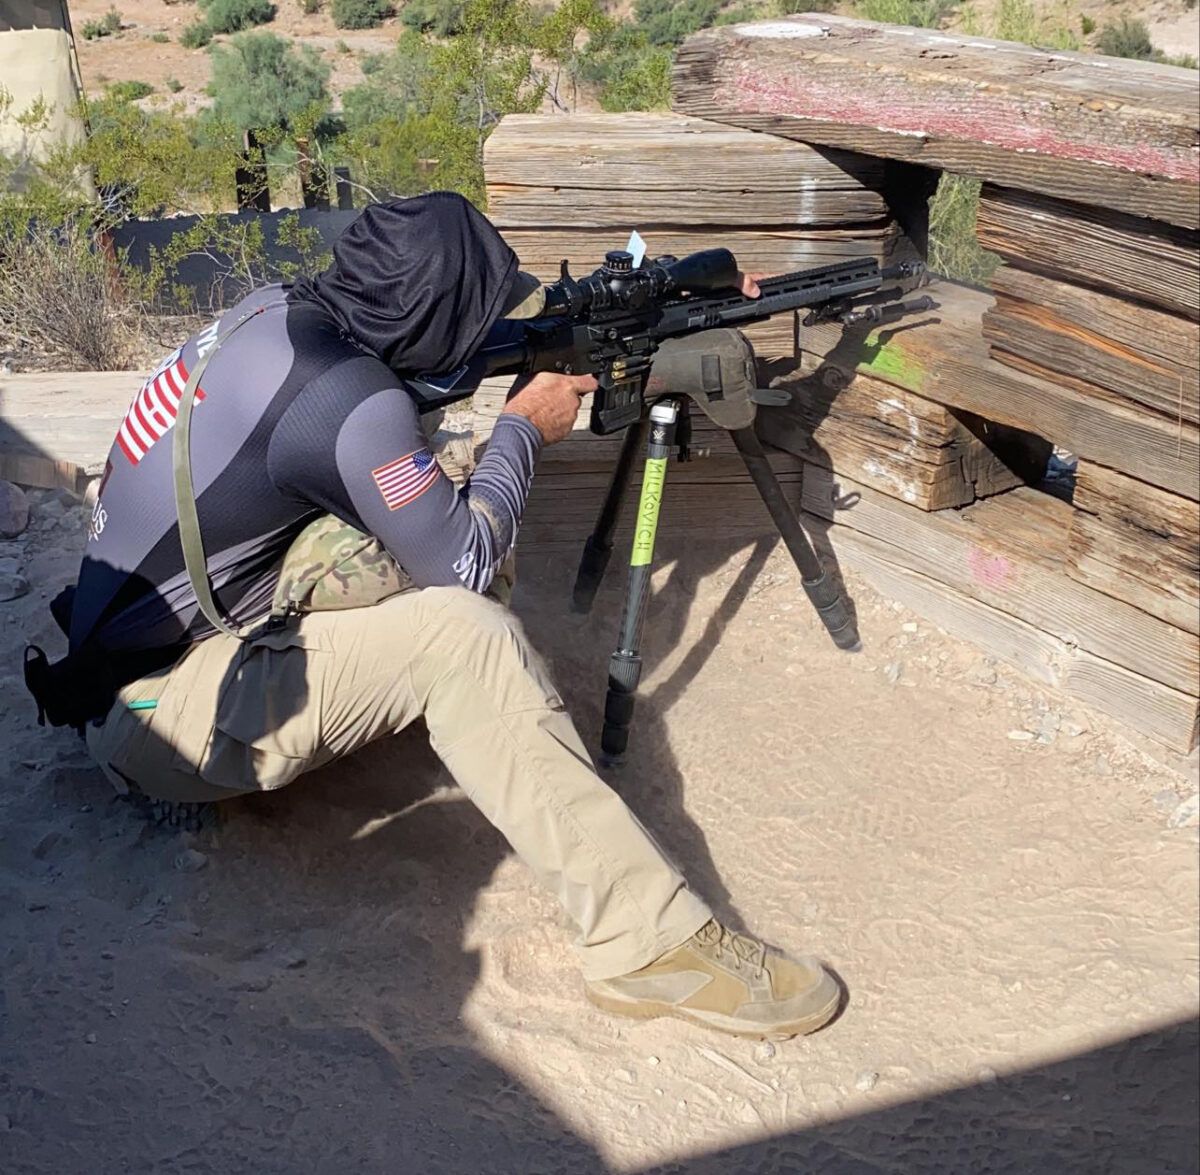
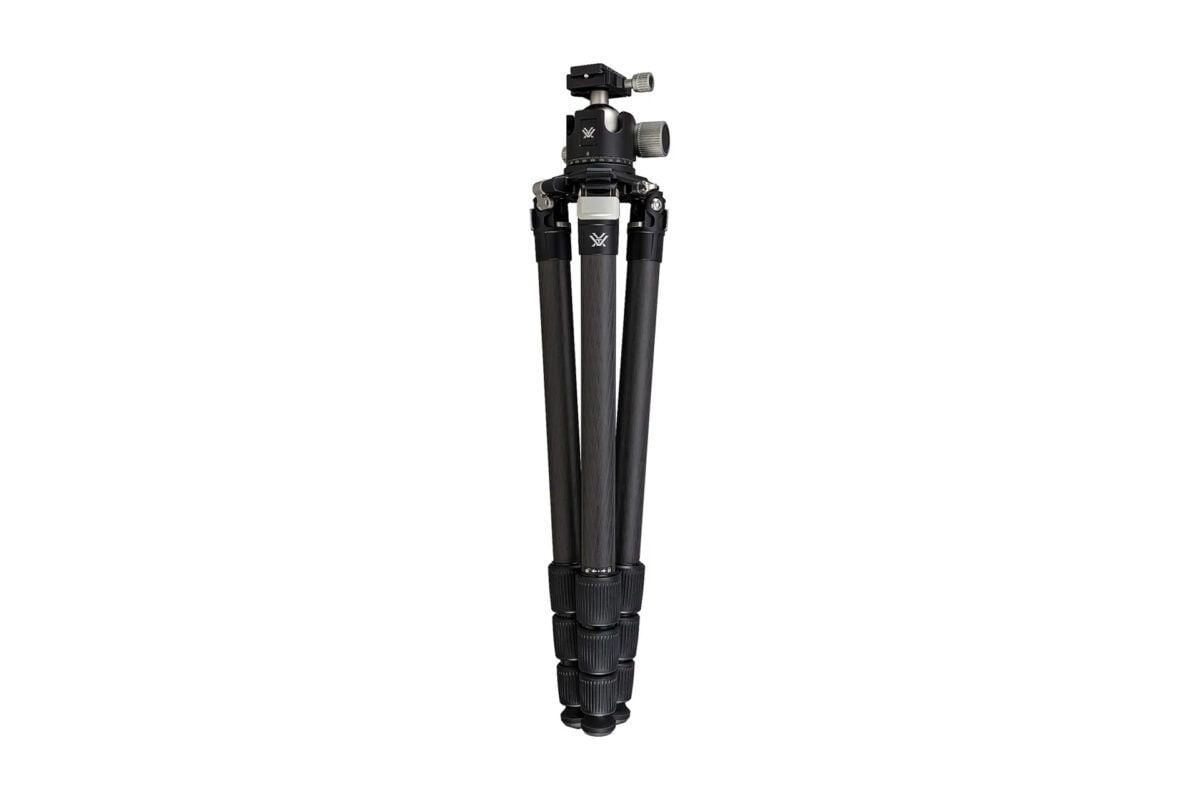
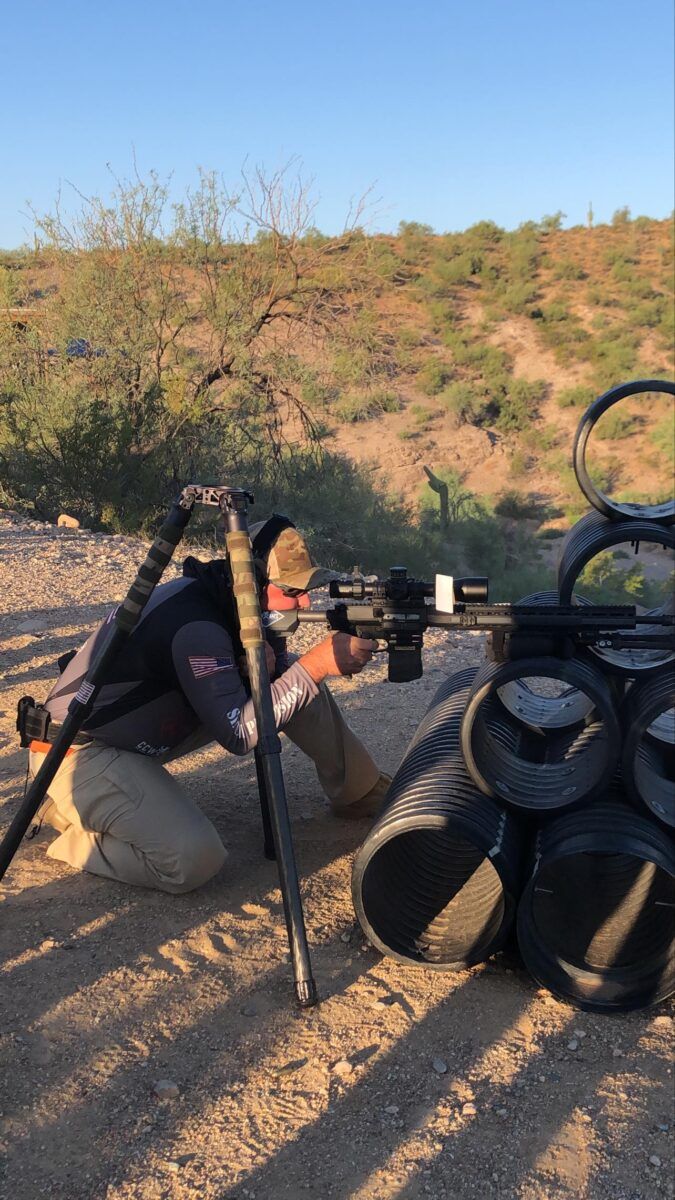
Jeremy Tye – With two points of contact, I will be supporting the rifle from the front and the rear. Imagine you have a PRS barricade. You can shoot that in a variety of different ways. The fastest is using one point of contact. The second way is supporting the very front of the rifle, and then to get support in the rear, using a tripod. Tripods are pretty versatile tools if you know how to use them correctly.
Generally, to do a two-point of contact position, you will have to attach your support bag to the rifle itself. You can strap it onto the fore-end, and that works ok. However, the best approach is to use some sort of dedicated attachment and clamp the bag to the rail as far forward as you can. That way, when you are moving the gun from position to position, you can manipulate the gun and bag in conjunction with each other in one hand, and you can manipulate the tripod with your other hand.
Once the gun is supported with the prop at the front of the rifle and the tripod on the rear, I simply build as good of a modified prone position behind the gun as I can.
The fundamentals stay the same in every position. I just need to determine how I am going to attack the prop. Am I going to go with one point of contact or two? Then I ask what tools I will use to accomplish that and if I have enough space behind the gun after determining what technique I will use.
Q: Sometimes there is not enough space to get into a modified prone position?
Jeremy Tye – Sometimes the match directors get tricky. They’ll give you a prop to shoot off of like a rock, but a foot and a half behind that rock is a cliff face or rock wall. This will restrict your ability to build a position behind the gun. At that point, you’re probably going to have to break down from those modified prone fundamentals, and maybe you can get a shoulder behind the gun, or maybe at that point you’re completely free recoiling (laughs), and you’ve got your fingers crossed that you’re going to be able to see something at the target if you miss, as there’s no way you are tracking that bullet in flight. It is what it is. Sometimes the match directors like to have fun and throw a curveball at you like that. You don’t see it too often.
Q: What about a tripod as front support?
Jeremy Tye – You can reverse things and use the tripod as front support and the prop as rear support, maybe, depending on the circumstances. But, it is much easier to use the prop as the front support as it allows you to use the tripod in the rear. The tripod is what enables you to have adjustability to modify your point of aim up, down, left, or right. You can do that off of the tripod very easily. You can’t do that with a fixed point of contact on the rear of the gun.
Vortex Radian Carbon with Ball Head Tripod Kit
$899.99 at AR15Discounts.com Prices accurate at time of writing
Q: So, let’s talk about using a tripod correctly. I guess that I’m visualizing it wrong.
Jeremy Tye – Most people picture propping the gun’s buttstock up onto the top of the tripod. However, that’s not how we do it. Instead, we use the tripod to provide rear support by grabbing ahold of one of the tripod’s legs. As a right-handed shooter, I would use my left hand to pull one of the tripod legs into the rifle from the right side.
So, if I have the rifle set up on a prop and it is facing the target downrange, I will put the tripod to the right of the rifle. I’ll get down into my position and acquire a rough sight picture of where the target is somewhere within the scope. Then I am going to drag the tripod towards the stock of my rifle with my left hand, and I am going to “connect” the tripod to the buttstock of my rifle using that tripod leg, just pinching them together using my hand strength and friction.
Tripod legs are adjustable in length generally, and they are angled out from the apex of the tripod. So, to repeat, I will simply pull one of those angled legs into the gun to give me an angled surface for the buttstock to rest against. I am then just going to pinch that buttstock onto the leg of that tripod. If I do that correctly, this position is as stable structurally as a prone position is off of the ground.
Q: So, it’s not like using the tripod-like with a camera. You’re just using the leg of the tripod and smashing the rifle against the leg, and that acts as a stable surface?
Jeremy Tye – Correct. Now you can also shoot off the top of the tripod, and there are some stages where match directors will have a stage sponsored by a tripod manufacturer. Tripods will be provided, and shooters will be told they must shoot off the top of a tripod. That’s the traditional way to use a tripod, and it’s no different from the traditional center-supported position we discussed earlier. At that point, you’d just be balancing the rifle on top of the prop, or in this case, you’re clamping into it and then attacking the stage just like you would any other.
If I had to break down tripod percentages, I’d say that 80-90 percent of the time, the tripod is used as rear support, and then shooting off the top of the tripod is the other 10-20 percent of the time.
Q: I’ve used tripods a lot for video work. They can be a bit unwieldy. I can imagine they could be tricky to work with in a competition setting….
Jeremy Tye – Practice is most certainly necessary. When you’re repositioning your tripod, you are not just repositioning the leg you are using to make contact with the rifle. There are two other legs out there that you have to be aware of, in terms of where they are in relation to the props on the stage or the natural terrain.
When it comes to precision rifle shooting tips, I think this is a big one. Too often, shooters get hung up is trying to position the tripod in the perfect spot but then lifting one of the legs off of the ground. If a leg is lifted, you don’t have a tripod. You have a huge bipod, and your stability goes from 100 percent down to like 10 percent.
Shooters will fight and fight to get that third leg on the ground while maintaining a sight picture, and they’ll often never accomplish it. I’ve seen many shooters time out without even taking a shot because they can’t figure out how to use the tripod the right way. So, a tripod can hurt you way more than it can help you if you can’t get the legs on the ground.
That said, knowing how to shoot with a tripod is pretty much required now, but you have to put in the work ahead of time. One tip I’d like to share to your readers is to mark their legs with a Sharpie for each different shooting height…standing, kneeling and seated. If you have to deploy those legs on the clock, you’ll be able to move a lot quicker.
Q: This has been very informative. Any closing thoughts when it comes to precision rifle shooting tips?
Jeremy Tye – To wrap it up, when it comes to precision rifle shooting tips, remember that what separates beginners from the more advanced is the ability to call wind on-the-fly. You can start with a guess, but you’ve got to be able to adjust quickly. Winds can change, and you have to have the ability to modify your plan based on what you see before and after your first shot. Watch the bullet in flight, and read what the wind is doing to your bullet. This is the key skill to learn.
After that, you have to build a durable position behind a rifle, in modified positions other than prone, so you can get visual information through your scope about what the bullet is doing during flight. Remember, if you can’t track the trace through your optic, the info about what the bullet is trying to tell you never reaches you.
Finally, advanced shooters are able to manage their equipment effectively – not only tripods but bags. Work on being able to put a support bag on a prop the first time so that it provides the amount of support you need it to when you place your rifle on top of it. These are the kind of things that make a difference, and the precision rifle shooting tips that I think your readers should know.
###
Did you find this article useful?
Let the author know with a 5 star rating!
Average rating 4.9 / 5. Vote count: 39
No votes so far! Your rating will help us continue to provide valuable and interesting content.
Since you found this post useful...
Follow us on social for first dibs on brand new content!
We are sorry that this post was not useful for you!
Let us improve this post!
Tell us how we can improve this post?
Related Posts:
Precision Gas Gun Shooting Basics with Jeremy Tye AR enthusiasts seeking new challenges and excitement can find themselves venturing into the world of long-range, precision gas gun shooting. One shooter fast making a name for himself in the…
Precision Rifle Shooting for Beginners – Critical… We recently sat down with professional precision shooter Jeremy Tye to learn more about what it takes to get into precision gas gun shooting and advice on rifles, ammo, and…
Competitive Shooting with Sun and Shadow Becoming better at competitive shooting isn't just about having the latest, greatest gear. It also involves preparation, practice, good organization, and the proper mindset. To learn more about how we…
Jared Reston - Training & the AR-15 for Law Enforcement ARBuildJunkie recently spoke with Jared Reston of Reston Group about the AR-15's vital role in law enforcement and just how critical it is for LEOs to seek out their own…
Unforced Errors & AR-15 Mistakes to Avoid with Mark… Simple mistakes mental mistakes and bad gear choices may be holding you back from becoming a better shooter and a more capable armed citizen. To learn simple, practical areas where…
Special Purpose Rifle (SPR) Basics with Ridgeline Just what is a "Special Purpose Rifle" or SPR and why are these sorts of AR builds becoming increasingly popular? To find out more we reached out to Alex Hartmann…
Subscribe
1 Comment
Most Voted
NewestOldest
Inline Feedbacks
View all comments
Anthony
4 years ago
what would be a good scope for a Remington sps. 308
If you want to be among the first to know when we release new content, your best bet is to sign up via email:
We’ll keep the emails to a minimum and we will never sell or give your information to a third party.


 Basics with Ridgeline")
what would be a good scope for a Remington sps. 308