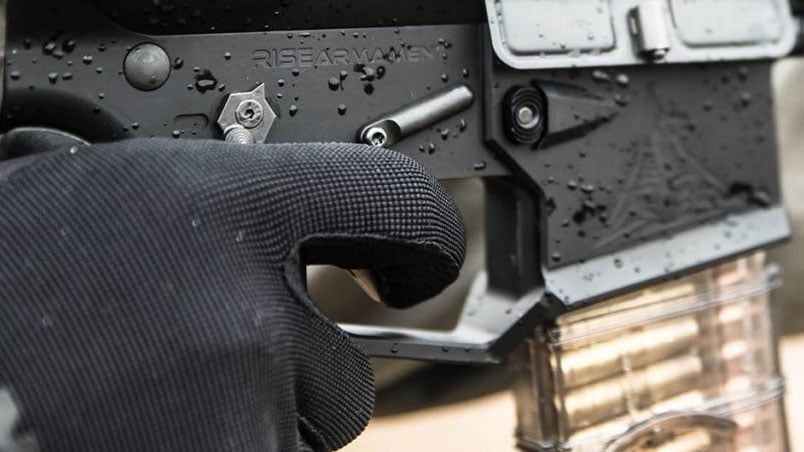
Not ready to upgrade to a new trigger for your AR? Performing a simple trigger job MIGHT be for you…provided you have the right tools and training. This isn’t for everyone.
How to perform an AR-15 Trigger Job? For starters, it goes without saying that one of the best ways to improve the feel and function of your AR rifle is upgrading fire control group. The mil-spec AR trigger is perfectly functional, but out of the box it can be gritty, heavy and have a fair amount of creep.
There are plenty of aftermarket triggers on the market. Many of them can be a drastic improvement in the function of your rifle. Most aftermarket triggerrun in the $100 to $300 range. Likewise taking your rifle into a gunsmith for a trigger job can easily cost the same. Performing a simple trigger job is yourself is a cost-effective way to improve the function of your rifle. Best of all it…can be done for $30 or less.
Disclaimer – How to Perform an AR-15 Trigger Job
Please note that this visual guide on how to perform an AR-15 trigger job is for educational purposes only. You should only attempt this procedure if you have a firm knowledge of the workings of this weapon system and are properly trained in its maintenance and modification. All work done on your rifle is at your own risk.
What is a Trigger Job?
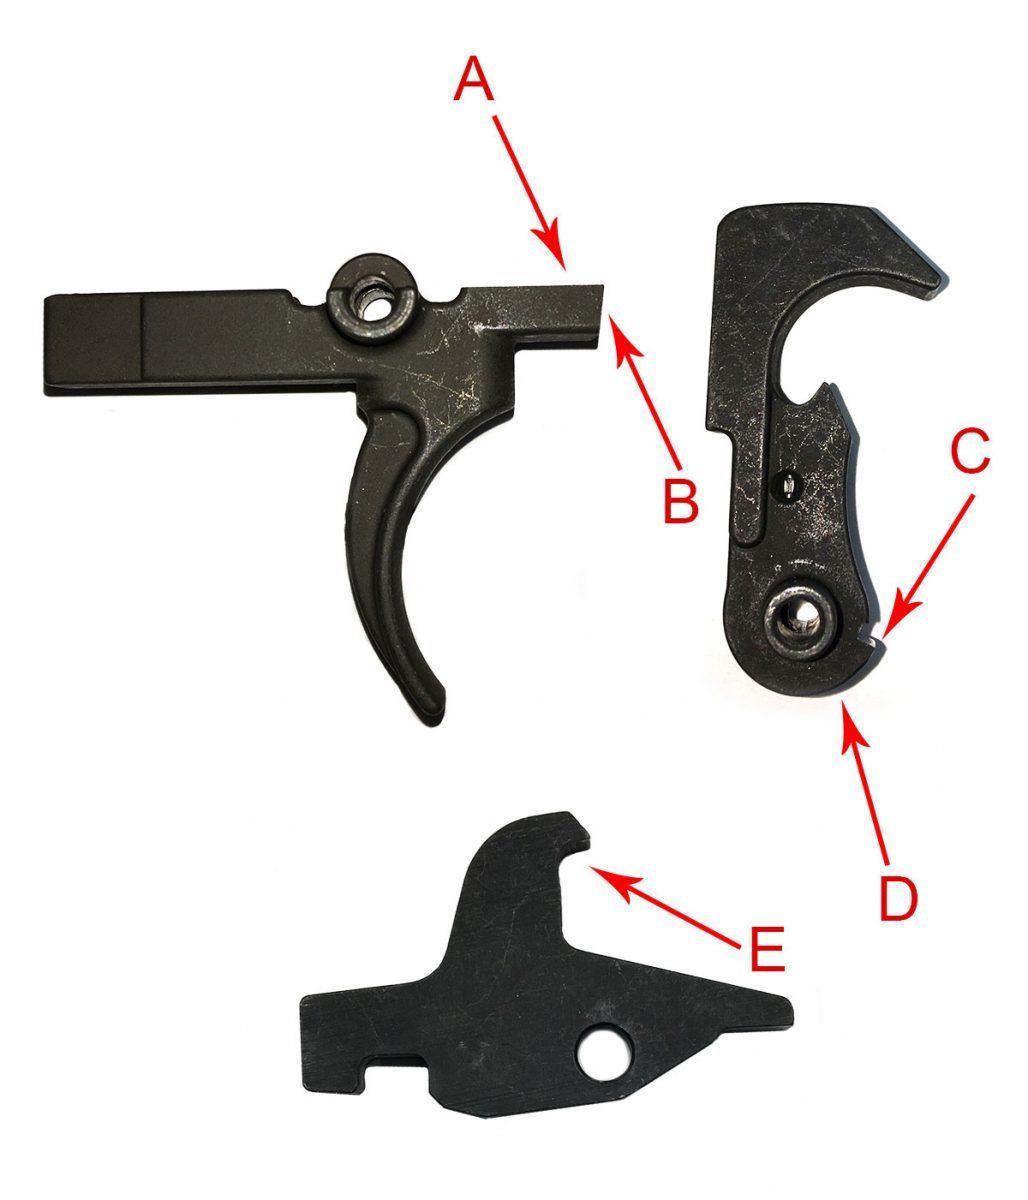
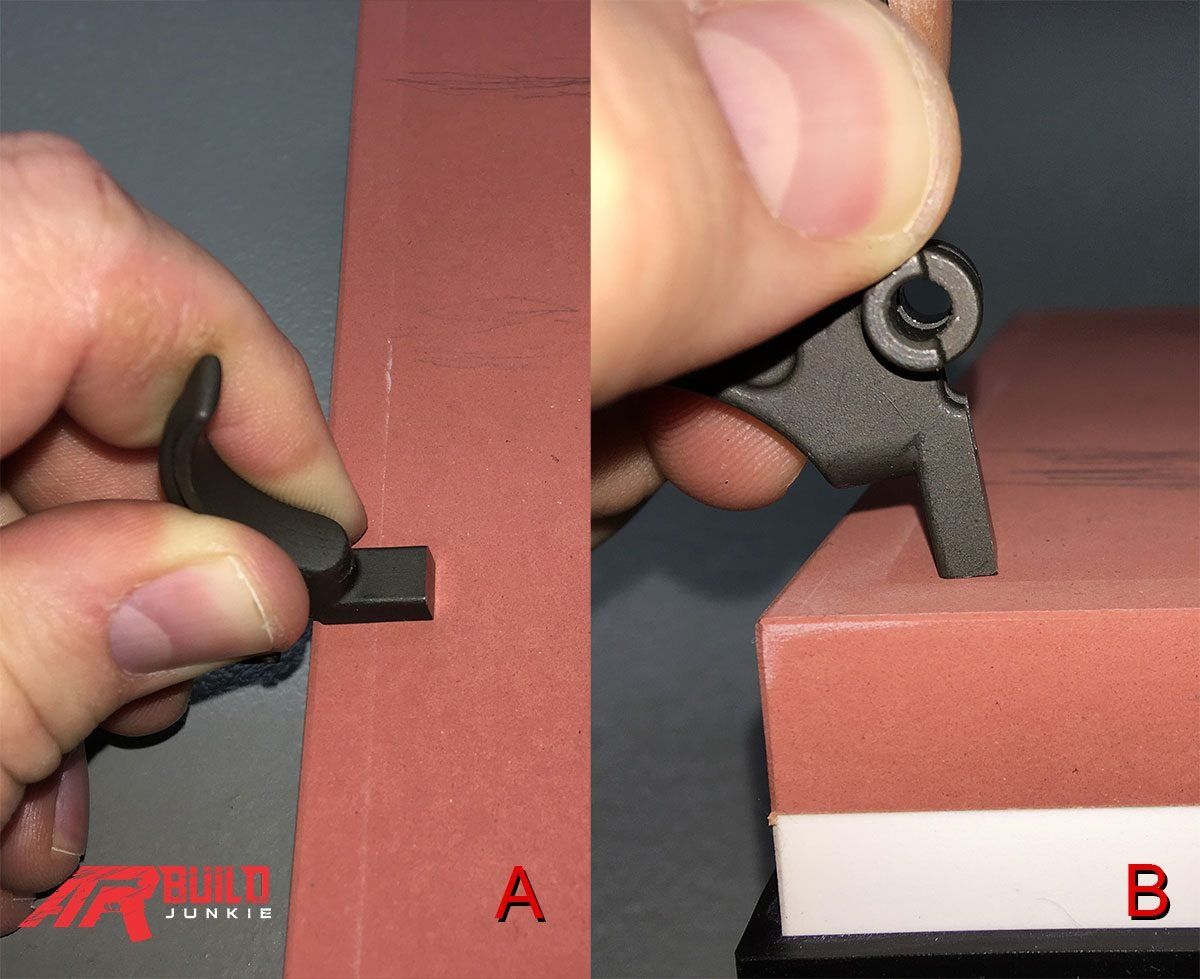
Before we get into how to perform an AR-15 trigger job, we should take a moment to discuss what a trigger job is and what specific issues it attempts to correct. The standard mil-spec trigger can be gritty and heavy. This comes in the form of surface imperfections in the friction bearing, or engagement surfaces of the trigger and from the tension that the springs are under. To correct the gritty feel in a trigger we will polish the contact surfaces in the trigger, hammer and disconnector (Fig. 1).
Fig. 1
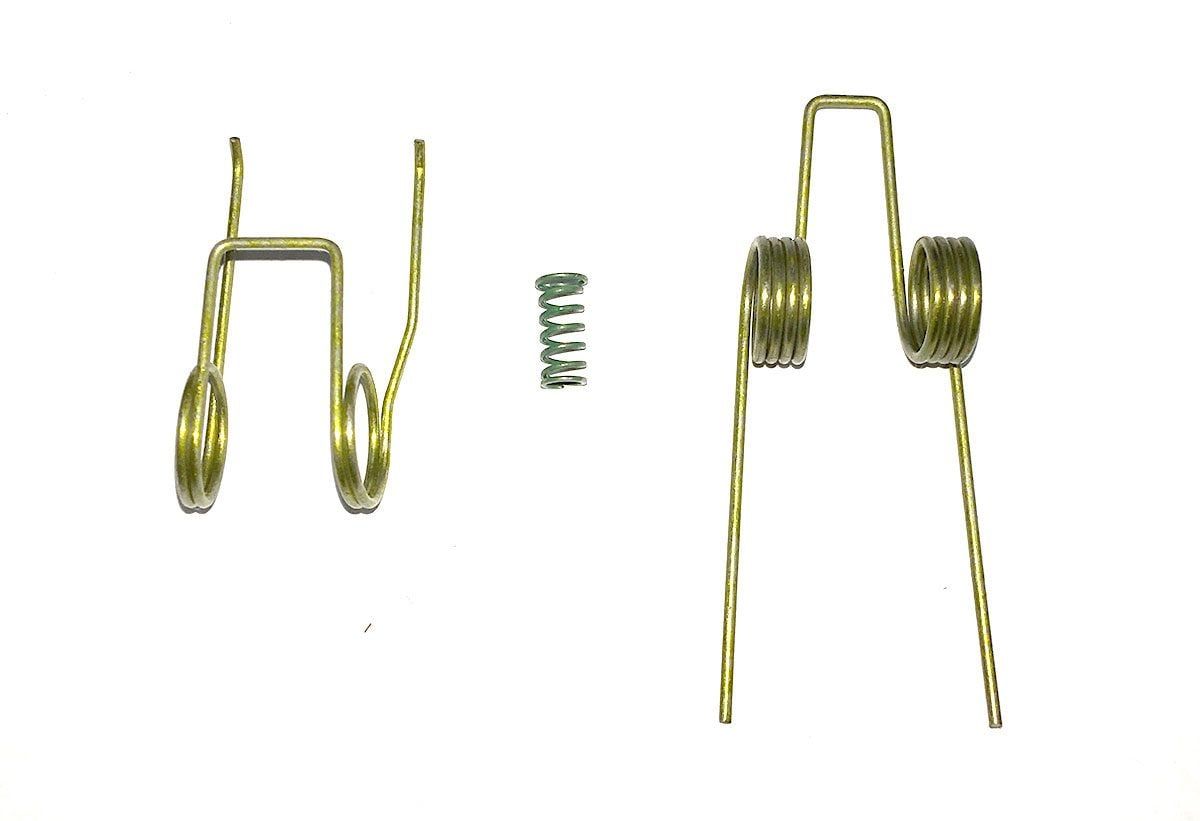
To adjust the pull weight, we will install an aftermarket spring set consisting of new hammer, trigger, and disconnector springs (Fig. 2).
Fig. 2
What You Need to Get Started
The particular spring we are using today is the Reduced Power Spring Set from JP Enterprises. JP Enterprises makes a few different spring sets that range from 3.5 to a 4.5 lb pull weight. Which you choose is up to your personal preference and how you will use the rifle. To perform this trigger job, you will need only a few basic tools:
Polishing Your Trigger – How to Perform an AR-15 Trigger Job
We will focus on two engagement surfaces on the trigger. See A/B on Fig. 1.When polishing any of the engagement surfaces it is crucial to keep the surface geometry the same as the part was designed to have.
In other words, if the surface is flat…keep it flat. If the surface is rounded, keep the same rounded surface (do not flatten it or change the shape/angle of the curve).
We will start with the top face on the front section of the AR trigger (A).
Avoid the Dremel
We will be polishing this using a high grit whetstone. Many at home gunsmiths often reach for a Dremel when looking to perform a trigger job, but I cannot stress enough that this is NOT the tool for this job. The Dremel has a curved sanding/polishing surface. This is not conducive to keep flat, even surfaces on the precisely engineered surface in our fire control group.
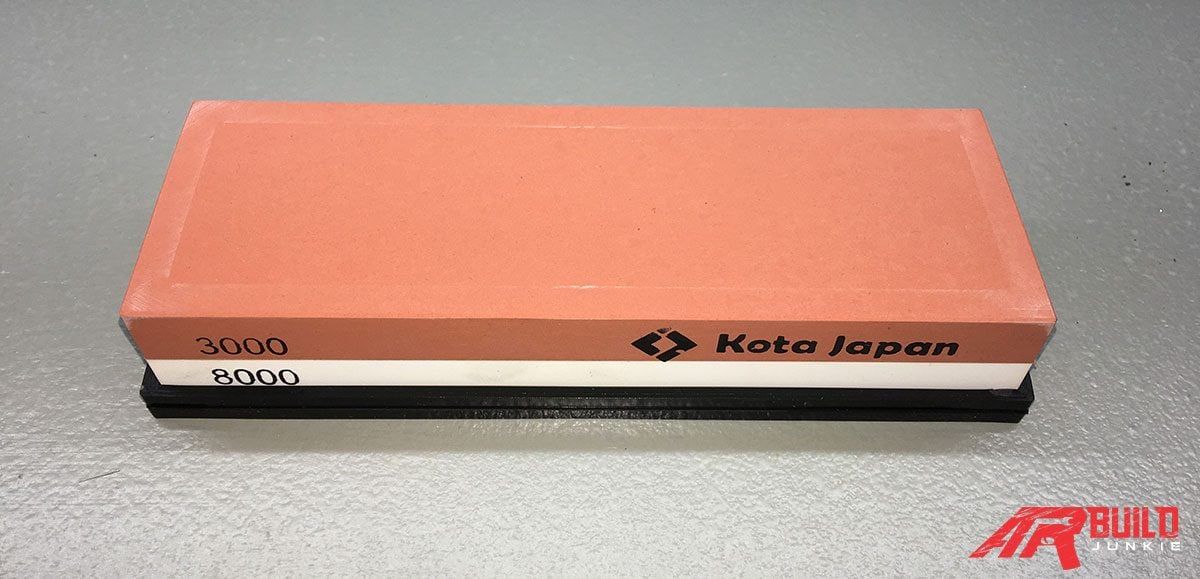
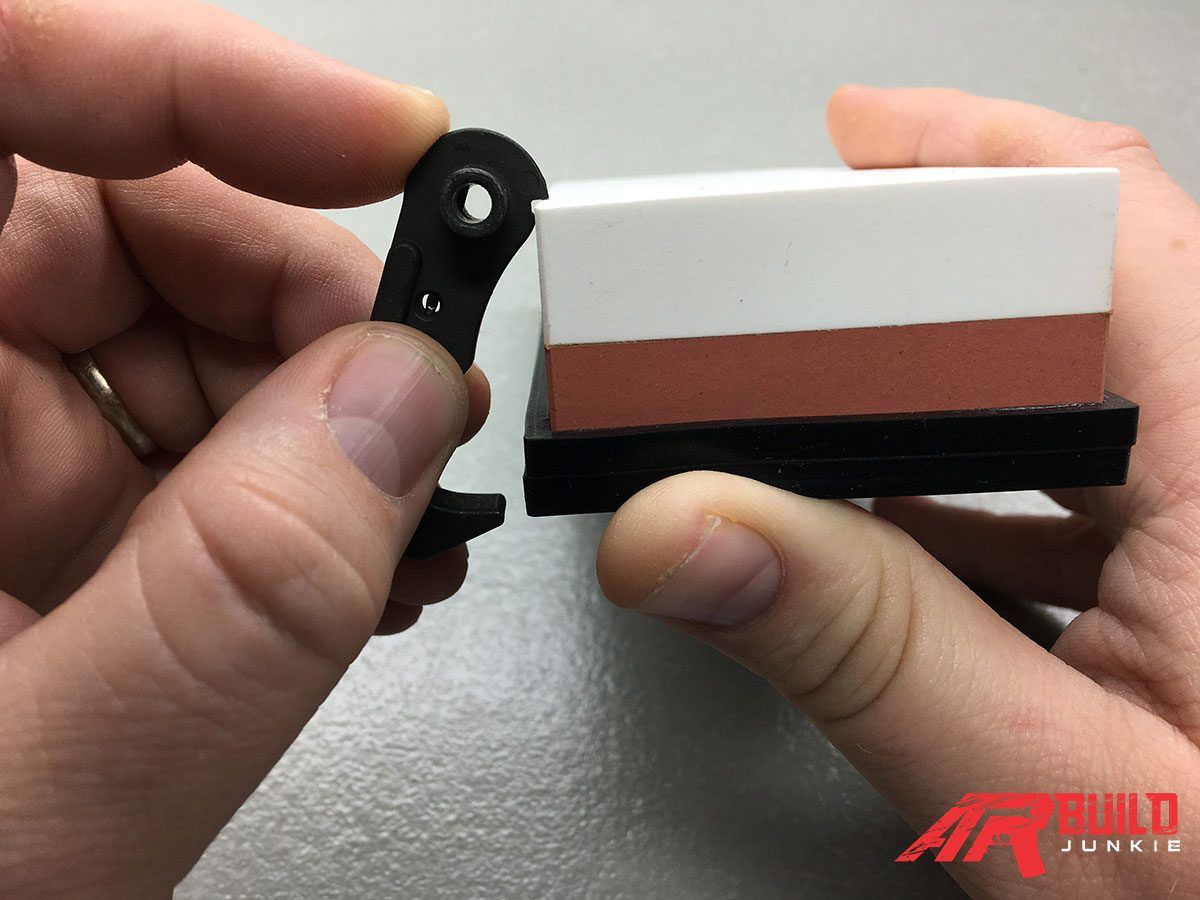
Apart from that, even at its lowest setting it will be moving too quickly to do the precise work we need to do to perform this job correctly and safely. The ending polish on the engagement surface should be in the 6000-8000 grit range. My preferred whetstone is a 3000/8000 grit whetstone.
Fig. 3
Begin by soaking the whetstone according to manufacturer instructions. After the whetstone is prepared, set it up on a non-slip surface so that it will not move during polishing (Fig. 3).
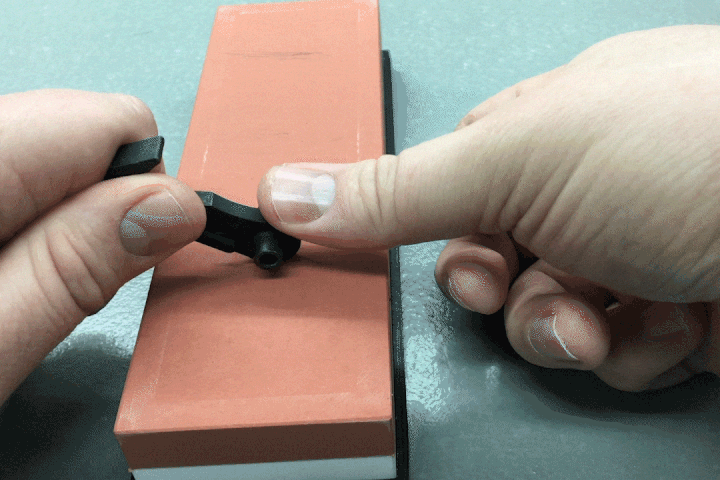
We will put the trigger flat on the whetstone surface starting on the 3000 grit side (see also Fig. 4a).
Fig. 4a, 4b
Slide the trigger back and forth slowly across the stone’s surface. Make sure to keep it flat against the stone, and not to rock it in any direction. Keep this up for a few minutes until you have fully smoothed the surface, then move on to the surface marked B on Fig. 1.
Repeat the same steps on surface B, the flat front face of the trigger until you have achieved a smoother surface here as well (see also Fig. 4b).
Polish and Repolish
Once both surfaces of the trigger have been polished using the 3000 grit side, flip the stone or switch stones (depending on the design of your whetstone). Now polish both surfaces again using the higher grit stone/side following the same steps as before.
Once both surfaces have been polished at a high grit (6000-8000 grit level) and have a mirrored finish you are done with polishing the trigger.
Jewelers rouge/buffing paste can also be used to aid in the polishing of the fire control group surfaces. If used, be sure that all of the paste has been cleaned from parts before reinstalling.
Polishing the Hammer – How to Perform an AR-15 Trigger Job
On the hammer, there will also be two surfaces that we will be polishing, see C/D on Fig 1.
Begin with the small ledge, C, on the hammer. When choosing a whetstone for this project it is important to get a stone that has a sharp edge on at least one side. Having that crisp edge will aid in getting the small ledge polished.
Fig. 1
As before, we will set up the hammer surface flat on the whetstone surface starting on the 3000 grit side (Fig. 5) and polish is a back and forth sliding motion.
Surface D on the hammer will require if a bit different approach. If the trigger and hammer that are included in your fire control are nickel boron or nickel teflon coated, it is not necessary to polish surface D.
Fig. 5
While you may notice some difference in the smoothness of the action, it will likely be minimal compared to results that can be achieved on a typical phosphate coated mil-spec trigger group.
When polishing surface D, it is important to maintain the rounded shape of this part of the hammer. To polish while maintaining this shape, rock the hammer in an arc as you slide the hammer across the surface of the stone (Fig. 6).
Fig. 6
Repeat the above steps on both engagement surfaces until smooth and a greater polish is achieved on the 3000 grit stone. Then move to the 6000 grit stone and repeat.
Polishing the Disconnector – How to Perform an AR-15 Trigger Job
The last step in polishing our fire control group is to polish the hook on the disconnector (Fig. 1e).
Typically this surface will be flat, but depending on the manufacturer of your disconnector it may have a slight curve. If this is the case, maintain this curve using a rat tail file wrapped in a high grit finishing sandpaper that can be found in most auto part stores.
If the surface is flat, we will polish using the same method as on the flat portion of the hammer…moving from the 3000 grit to 6000 grit until a mirror polish is achieved.
Lightening the Trigger Pull Weight – How to Perform an AR-15 Trigger Job
We will replace the factory hammer, trigger, and disconnector springs in the fire control group once the polishing stage is complete.
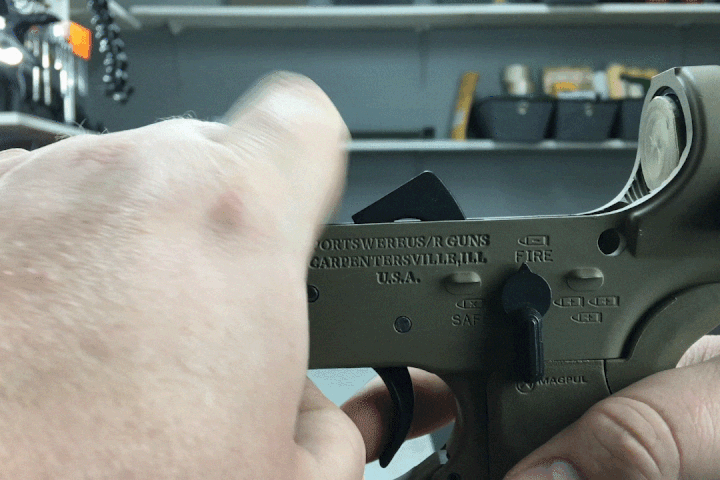
Once you have the springs attached to the trigger and hammer and reinstalled, we will test our fire control group on safe and fire to ensure proper function. The function can be checked using your hand to stop the hammer from striking the front of the receiver (Fig. 7).
Fig. 7
You can also invest in a polymer stop such as the Brownells AR-15 Hammer Drop Block or even an inexpensive set of snap caps. (Snap caps require attaching the full upper to test, but can be a cheaper alternative to the hammer drop block.)
Conclusion – How to Perform an AR-15 Trigger Job
If you followed along with this guide on how to perform an AR-15 trigger job, you should now have a smoother crisp trigger pull that is a big improvement over the stock mil-spec trigger setup. Doing this type of work on your AR-15 will also allow you to become more familiar with its function. It can provide a sense of satisfaction at servicing your own weapon.
This isn’t for everyone though. If you don’t have the proper tools, or this seems too intimidating…there are other options. One of the great things about the ubiquity of this weapon system is the host of great aftermarket drop-in options. This is especially so in the triggers that are available.
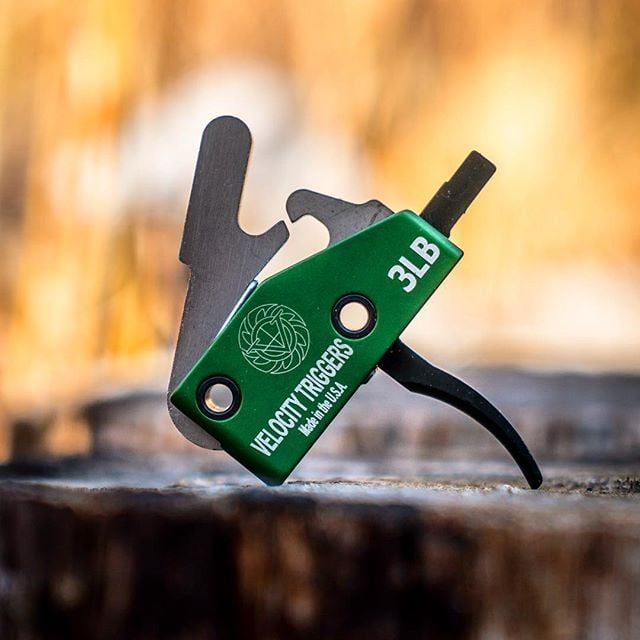
Purchasing a pre-made fire control group like the ALG Defense Advanced Combat Trigger (ACT) is a very cost-effective way to get started with adjusting the trigger in your rifle. Moving up, there are great entry-level options like the Velocity Drop-in Trigger. However, If you want to move beyond entry-level, models like those from Geissele also exist. There truly is an option to suit every shooter.
###
Jeremy Bedsaul is an avid writer, video editor, & shooter. His oldest shooting memories go back to shooting 22s with his father and grandfather out in rural central Missouri. Jeremy is a husband and father of two girls who can’t wait until they are old enough for him to share his passion for firearms with. Outside of firearms, Jeremy’s interests include RPG gaming, philosophy, arguing about politics, and keeping up with the latest tech and gadgets.
Did you find this article useful?
Let the author know with a 5 star rating!
Average rating 4.9 / 5. Vote count: 172
No votes so far! Your rating will help us continue to provide valuable and interesting content.
Since you found this post useful...
Follow us on social for first dibs on brand new content!
We are sorry that this post was not useful for you!
Let us improve this post!
Tell us how we can improve this post?
1.4K
1.4K
Shares
Related Posts:
Jared Reston - Training & the AR-15 for Law Enforcement ARBuildJunkie recently spoke with Jared Reston of Reston Group about the AR-15's vital role in law enforcement and just how critical it is for LEOs to seek out their own…
Unforced Errors & AR-15 Mistakes to Avoid with Mark… Simple mistakes mental mistakes and bad gear choices may be holding you back from becoming a better shooter and a more capable armed citizen. To learn simple, practical areas where…
AR-15 Precision Long Range Shooting Basics AR-15 Precision Long Range Shooting? We reached out to the man who literally wrote the book on the subject, former Army Ranger sniper team leader Ryan Cleckner. His book, is…
Precision Rifle Shooting Tips - Fundamentals for… We expand beyond the basics to learn some more advanced tips for precision shooting, and what it takes to take your shooting to the next level. We discuss the importance…
Building an AR-15 - Avoiding Common and Costly Mistakes We recently sat down with Alex Bohl from Trajectory Arms to discuss how you can avoid common and costly mistakes when building an AR-15. As a professional builder, Alex knows…
Gun Training - AR-15 Basics with Mike Green of Green Ops Seeking training from a reputable company is a vital step in developing your skills with your newly built or purchased AR-15. Just having a high quality, reliable firearm is not…


https://www.youtube.com/watch?v=B03VxnzF6uM&lc=Ugz85Mmwfs1yBZO9Bs54AaABAg.9ETjwLUU0F69ETkMv81Jnu