Editor’s Note: Alex Bohl is the founder of Trajectory Arms. To learn more about Alex be sure to read ARBuildJunkie’s recent article about him and his company. Also be sure to visit Alex’s website and give him a follow on his social media channels. He can be found on Facebook and Instagram.
It is disheartening to find out that the brand new AR-15 you bought doesn’t run right. Many of the common issues seen in guns come from assembly issues where a little more attention to detail would have made a significant difference in quality.
I have created a basic AR-15 inspection you can do at a gun counter to check if a new gun is worth buying, regardless of who built it or what reputation a brand may have. Taking an objective view of this process can help you avoid a poor emotional purchase based on flashy gimmicks designed to catch your attention and empty your wallet.
You should be ready to make a purchase if you are doing an AR-15 inspection at this level so that you don’t waste anyone’s time. Though a complete inspection would require expensive specialty tools and technical experience, if a gun can pass these few basic things, the manufacturer is less likely to have cut corners in other areas you can’t see.
The only things you will need are a small flashlight that will fit inside the upper receiver, an empty magazine, and a small soft tool with a square edge like a match-stick.
The shop will need to be ok with letting you remove the BCG at some point. If they are not, ask if they will remove it for you (or find another shop). It shouldn’t need to be said, but negligent discharges happen, so before working on any gun, check that it is cleared and safe.
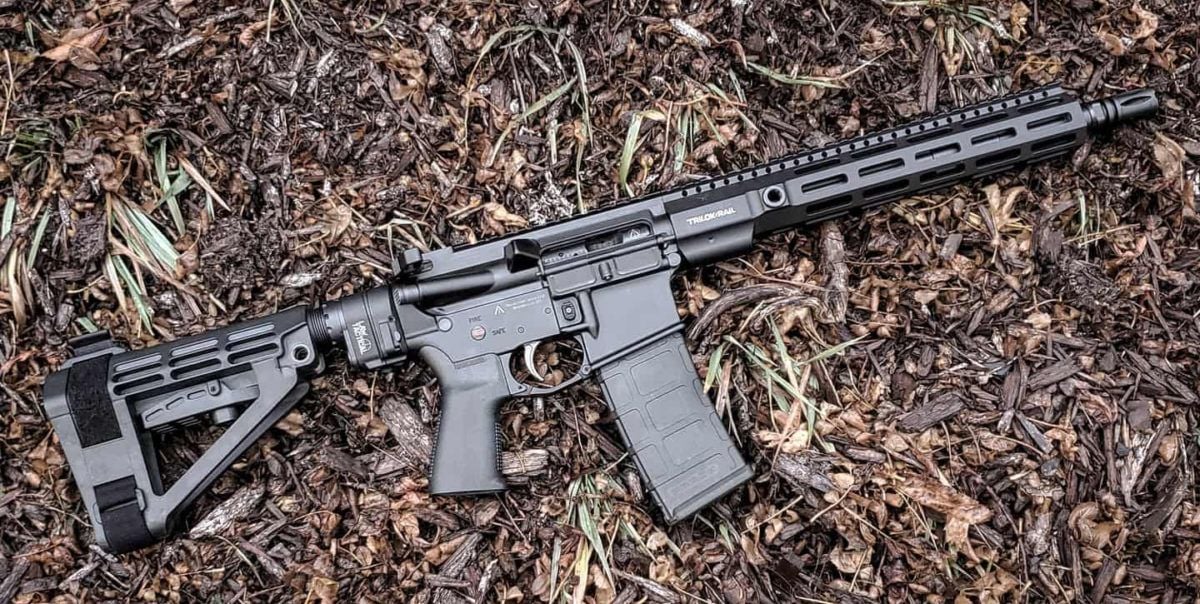
AR-15 Inspection: Getting Started
At this point, keep the rifle together as a whole. We will go over the exterior and function first before checking internals.
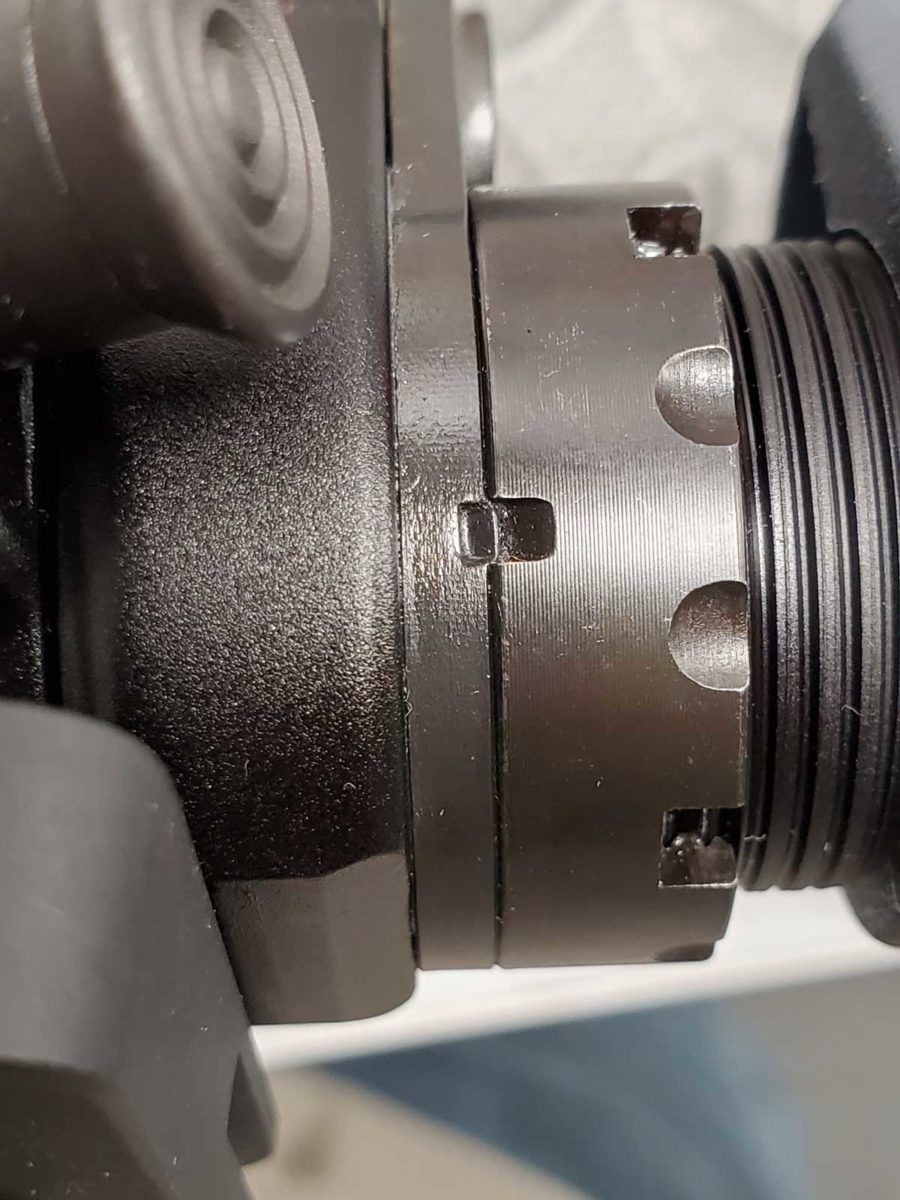
AR-15 Inspection – Castle Nut
Check that the castle nut is staked. It’s simple and free so if they skip this step, it’s a sign of laziness and there’s a chance they cut corners elsewhere. Just because Uncle Bubba’s budget gun hasn’t come loose in 800 rounds doesn’t mean yours won’t. Twist the stock with a bit of force and see if you notice any movement around the nut or end plate.
Castle nuts should always be staked to keep them from loosening up due to vibration and stresses imposed on the stock.
AR-15 Inspection – Function Check
Do a basic function check of the trigger, selector, pivot/takedown pins, and any other moving parts. Take your time and actually take note of the feedback you get from each part. Cheap parts may feel soft or squishy. They may also have hang ups or be difficult to move.
Make sure the trigger drops, resets and is safe when it should be. On safe, give the trigger a good firm squeeze to make sure it doesn’t drop.
You shouldn’t need a tool to push out the takedown pins. Some manufacturers will tell you this is how they take out the slop between receivers, but really most are just tight because the holes don’t line up right.
If the shop will let you load an empty mag, make sure it locks into place easily. Pull the charging handle to make sure it locks back. The magazine should drop free without assistance.
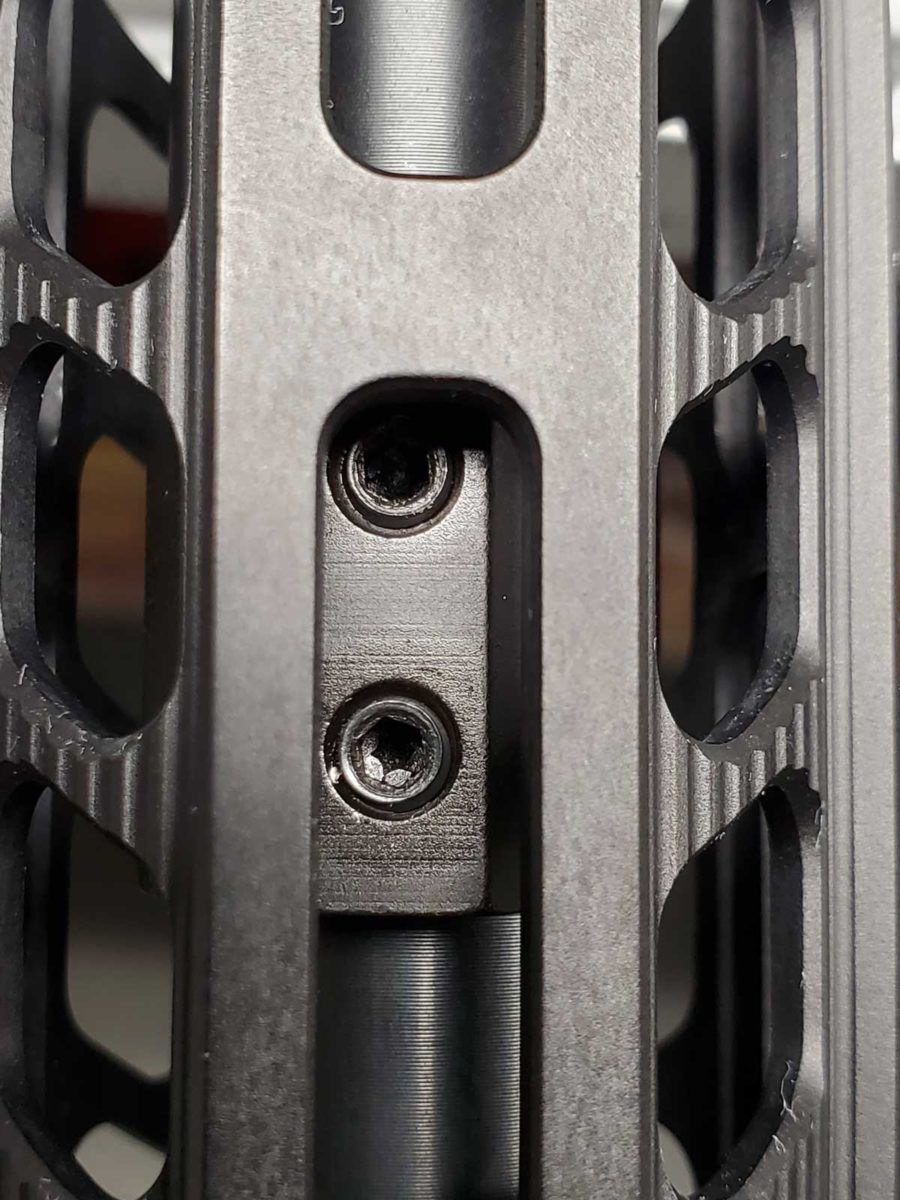
AR-15 Inspection – Rail Alignment
Sight down the top rail and see if it looks straight with the upper receiver. This may not be possible if there are optics or sights mounted to it.
Rail alignment – Alignment tabs don’t guarantee perfect timing with the upper. A good armorer will check this during assembly.
AR-15 Inspection – Gas Block Alignment
Using the rail as a reference, check that the gas block isn’t canted. It’s not a guarantee that it’s aligned, but a good indication it is close. While you are looking at it, if one set screw is set deeper than the other, there’s a pretty good chance the barrel has been dimpled which is a plus, however some barrels may be dimpled under both screws so it’s not a 100% giveaway.
Gas block alignment – The rail can be a good aid in judging gas block alignment on an assembled rifle.
AR-15 Inspection – Stock/Brace Alignment
Looking at the stock end of the receiver, check if the stock or brace is aligned with the pistol grip. Although a misaligned receiver extension is not the end of the world, we are looking for indications of “Friday afternoon” work. This can be difficult due to the amount of slop in some stocks, but it’s worth checking regardless.
AR-15 Inspection – Buffer Retainer
Push out the takedown pin and crack open the receivers just enough to watch how the back of the carrier engages with the buffer. When closing it, it should push the buffer back enough to disengage it from the buffer retainer inside the receiver. If it does, open it back up and look at the position of the buffer retainer. You will notice the large threads that the receiver extension (buffer tube) is threaded into.
The buffer retainer should have roughly the width of one thread between it and the pocket in the receiver and the retainer should have plenty of retention under the receiver extension.
AR-15 Inspection – Buffer Weight
Look at the stamp on the face of the buffer. It should at least have an “H” stamped on it. If there is no marking it’s a carbine buffer and is done almost exclusively as a cost saving measure, at your expense of course.
Minimum of an “H” marked buffer should be used. If there is no marking, remove the buffer to verify it is not a rifle buffer. From left to right – Carbine, Carbine H, Carbine H2, VLTOR A5H2, Rifle.
AR-15 Inspection – FCG Play
At this point, remove the pivot pin and set the upper group aside. Looking at the lower, wiggle the hammer and trigger and look for sloppiness in the pins. The hammer should have relatively little movement side to side.
AR-15 Inspection – Barrel/Upper Alignment
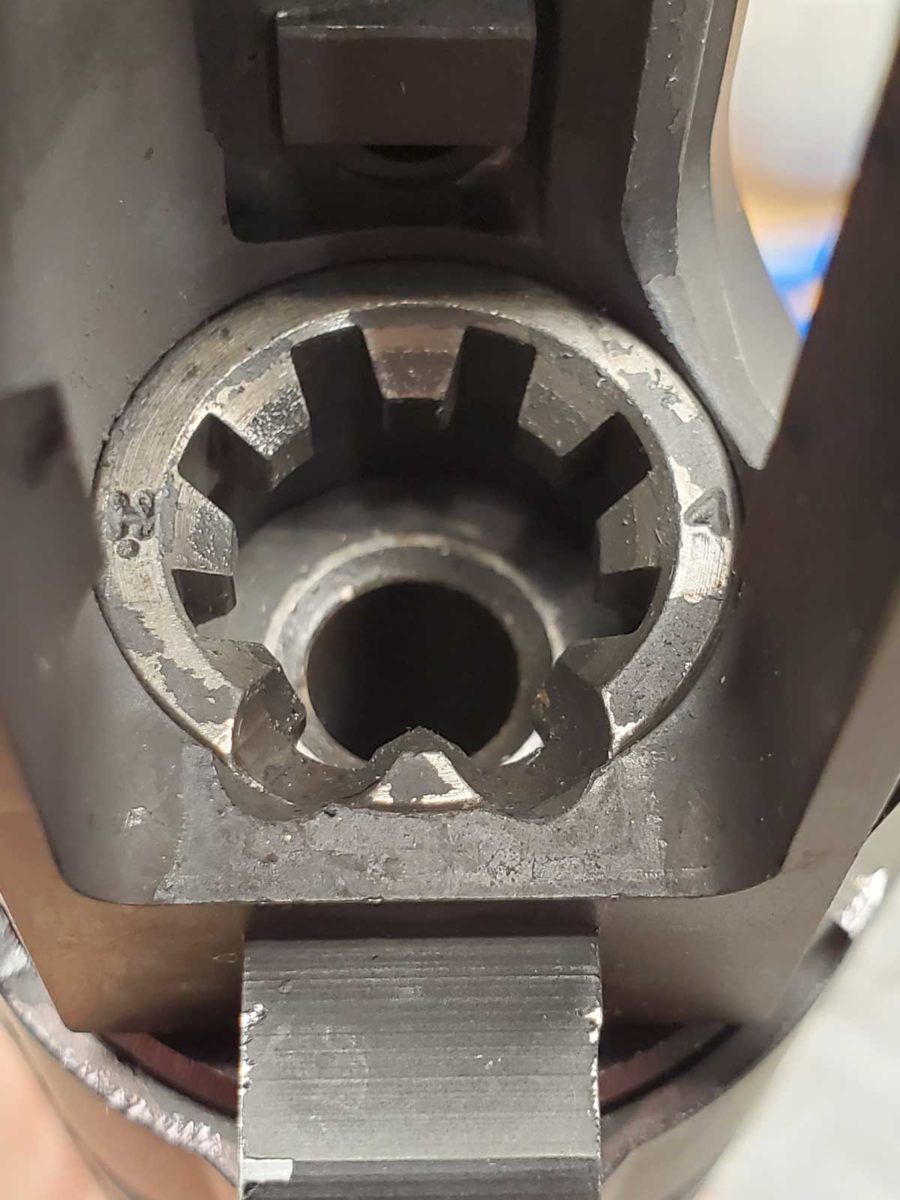
Looking at the upper now, remove the charging handle and BCG. Look at how the feed ramps align with the upper. If the ramps extend all the way into the receiver (known as m4 ramps) check that they are aligned and don’t look like the barrel portion is twisted. This is also where the soft tool comes into play.
Barrel Alignment- Feed ramps should be aligned and ramps should have no snags.
Run the end of the match stick or tool up the ramp and ensure it doesn’t snag on the transition. If it snags anywhere on the ramp or is misaligned, it could result in feeding issues down the road. Misalignment could be a good indicator of a bad receiver or loose barrel extension, and may allow the bolt to come into contact with the lugs in the barrel extension.
AR-15 Inspection – Chamber
Shine a light into the chamber. Barrels that don’t have some kind of durable surface treatment like nitride should be hard chromed. A lack of a surface treatment like nitride or chrome can lead to shorter barrel life. Look for rough machining, burrs, corrosion, etc. It should be fairly clean.
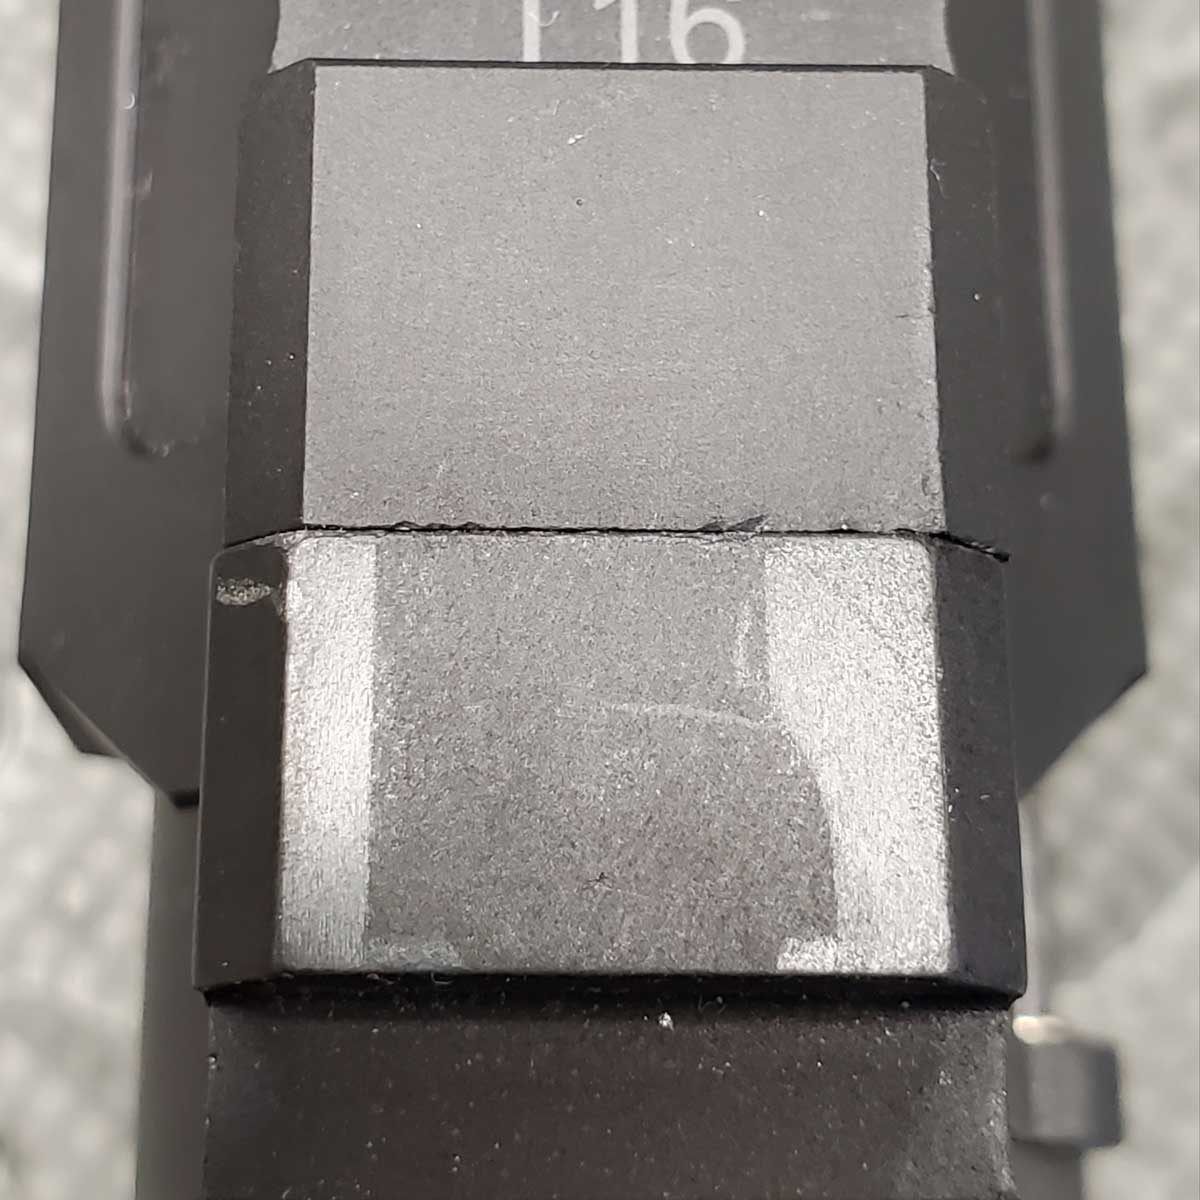
AR-15 Inspection – Bolt Carrier
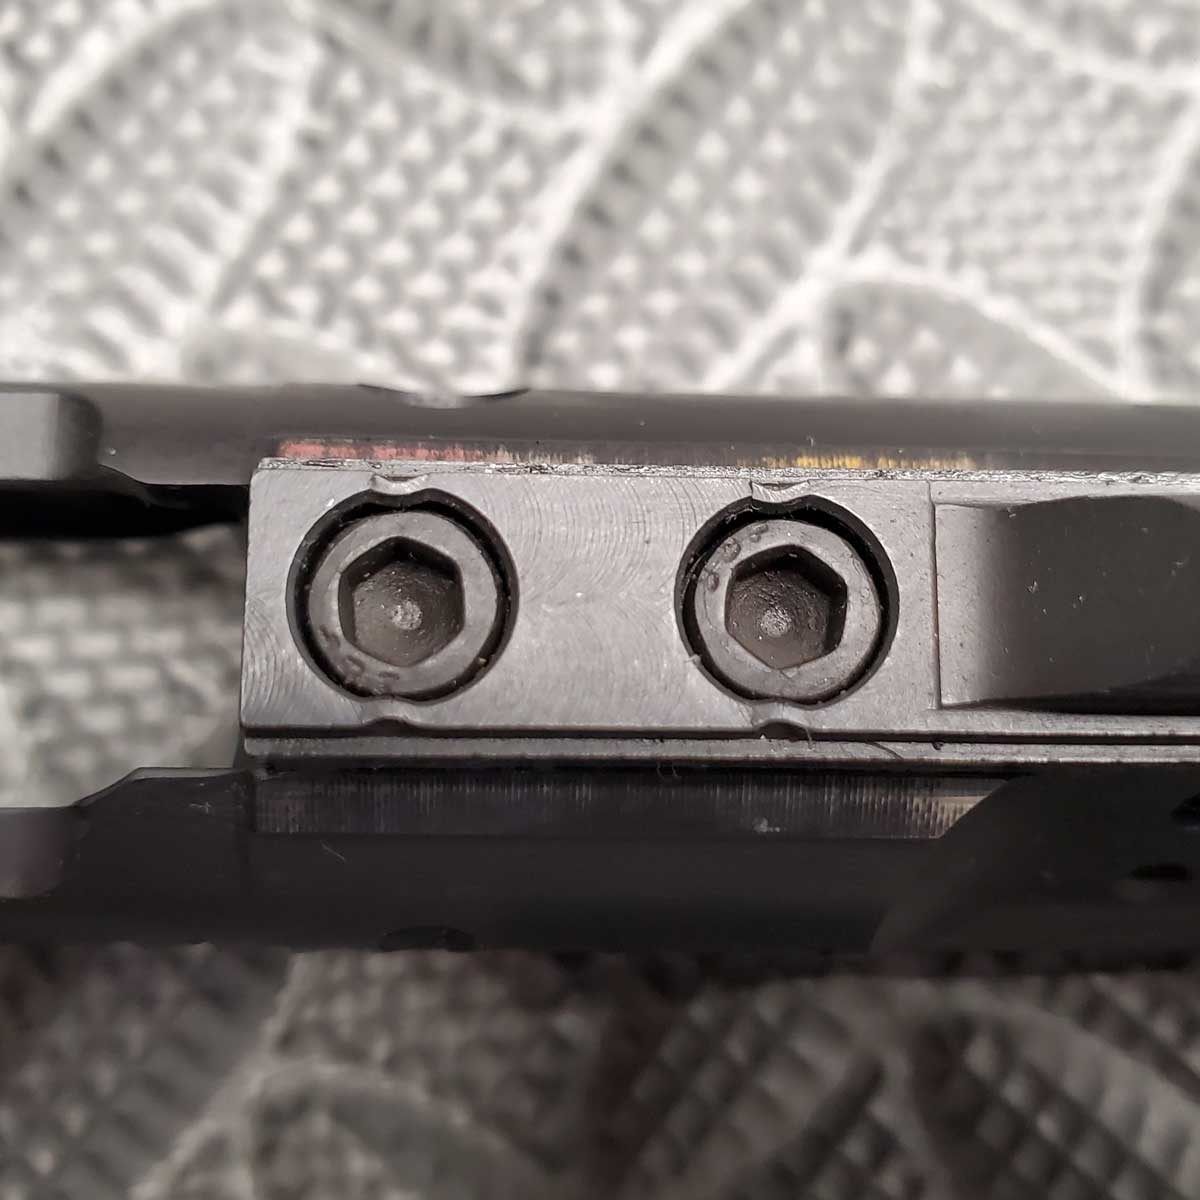
Inspect the screws and staking holding the gas key onto the bolt carrier. The head of the screw should be relatively squared and the staking should push plenty of material into the head to keep the screws from backing out. Unless the carrier is coated in something hard like nitride or NP3, the bore where the bolt resides and the inside of the gas key should both be silver in color from hard chrome.
Gas key staking – Soft shoulders and weak staking will lead to loose gas keys.
A little side note here, most BCG coatings are gimmicks to draw your attention away from their shoddy quality control. Be very skeptical about any coating, since they are not all equal often have detrimental effects on the dimensions of the components. There really is nothing wrong with manganese phosphate, but it’s probably not the ideal coating for most people. Shiny coatings are one of the biggest gimmicks done to attract your attention. Also, it’s 2020. Nickel boron doesn’t belong on BCGs, ever.
AR-15 Inspection – Bolt
Again, fancy coatings don’t mean anything here. Look on the side for markings indicating it has been proof tested and Magnetic Particle Inspected. Not all companies will mark them when they are done, and many companies will batch test but mark every one.
Regardless, it’s worth checking. Use your soft tool to push the ejector, It should be quite firm. Also inspect the Extractor. It should have a good square “hook” and should move very little with finger pressure. Extractors should also not be coated in slippery coatings like nitride since it will diminish the extractor’s ability to do its job. Finally, move the bolt in and out of the carrier. It should be relatively smooth, moderate amount of play, with no hang-ups.
AR-15 Inspection – Gas tube/key alignment
This ideally should be done with the bolt removed from the carrier, but if not, you can still detect major misalignment by slowly and carefully pushing the carrier into the upper receiver until it contacts the barrel extension. Don’t misinterpret the bolt locking into battery for key misalignment.
An AR-15 Inspection Summary
Depending on the price point of the rifle and its intended use, if it fails more than one of these tests, it’s probably best to keep looking. If the weapon is meant to be used as a defensive, bedside type of gun, the saying, “buy once, cry once” is wise advice, even if it’s your first gun.
If you already own an AR-15 or have one you can borrow, go through this AR-15 inspection list and see how it holds up. If you are really curious if your rifle is ready for defensive use, have an armorer or gunsmith who specializes in AR-15s inspect it to make sure it suits your intended use.
###
Alex Bohl is the founder of Trajectory Arms. To learn more about Alex be sure to read ARBuildJunkie’s recent article about him and his company. Be sure to visit his website and give him a follow on his social media channels. Alex can be found on Facebook and Instagram. Special thanks to Matthew Cripps and Jay Lurie, who assisted with the editing of this article…
Did you find this article useful?
Let the author know with a 5 star rating!
Average rating 4.9 / 5. Vote count: 43
No votes so far! Your rating will help us continue to provide valuable and interesting content.
Since you found this post useful...
Follow us on social for first dibs on brand new content!
We are sorry that this post was not useful for you!
Let us improve this post!
Tell us how we can improve this post?
Related Posts:
Building an AR-15 - Avoiding Common and Costly Mistakes We recently sat down with Alex Bohl from Trajectory Arms to discuss how you can avoid common and costly mistakes when building an AR-15. As a professional builder, Alex knows…
Jared Reston - Training & the AR-15 for Law Enforcement ARBuildJunkie recently spoke with Jared Reston of Reston Group about the AR-15's vital role in law enforcement and just how critical it is for LEOs to seek out their own…
Headspace Gauge & the AR – School of the American Rifle We recently reached out to Chad Albrecht at School of the American Rifle to discuss common misconceptions about AR headspace gauges, and confusion about various AR-specific headspace gauges on the…
Evolve Weapons Systems E-15 - An ARBuildJunkie Q&A with Adam… With quality control and attention-to-detail sometimes suffering in the firearms industry, Evolve Weapons Systems is quietly producing quality, properly built ARs from their McKinney, Texas headquarters. We recently sat down…
AR-15 Precision Long Range Shooting Basics AR-15 Precision Long Range Shooting? We reached out to the man who literally wrote the book on the subject, former Army Ranger sniper team leader Ryan Cleckner. His book, is…
Special Purpose Rifle (SPR) Basics with Ridgeline Just what is a "Special Purpose Rifle" or SPR and why are these sorts of AR builds becoming increasingly popular? To find out more we reached out to Alex Hartmann…
Subscribe
2 Comments
Most Voted
NewestOldest
Inline Feedbacks
View all comments
Riley Cooper
5 years ago
This info would be excellent in a step by step video.
Dennis Green
5 years ago
I’d like to understand what you meant by….”Also, it’s 2020. Nickel boron doesn’t belong on BCGs, ever”. What is wrong with that?
If you want to be among the first to know when we release new content, your best bet is to sign up via email:
We’ll keep the emails to a minimum and we will never sell or give your information to a third party.


 Basics with Ridgeline")
This info would be excellent in a step by step video.
I’d like to understand what you meant by….”Also, it’s 2020. Nickel boron doesn’t belong on BCGs, ever”. What is wrong with that?